We provide two Windows user licenses for our servers (Both VPS and Dedicated servers) by default, however the secondary user is kept disabled until the user decides to enable it.
The benefit of this secondary user is that you can use both users at the same time in two different RDP sessions, even on two different devices. However, the server’s resources will be split between sessions.
Step 1: Access the Server
If you’re not already on your FXVM Server, you’ll want to use Remote Desktop Protocol (RDP) to connect. Open the RDP client and log in to your server using your TRADER credentials.
Step 2: Open Server Manager
Once logged in, look for the Server Manager, you can manually open it by:
- Clicking on the Start button.
- Searching for “Server Manager.”
- Clicking on the Server Manager application.
Step 3: Open Computer Management
In Server Manager:
- Go to the Tools menu in the top right.
- Select Computer Management from the dropdown list.
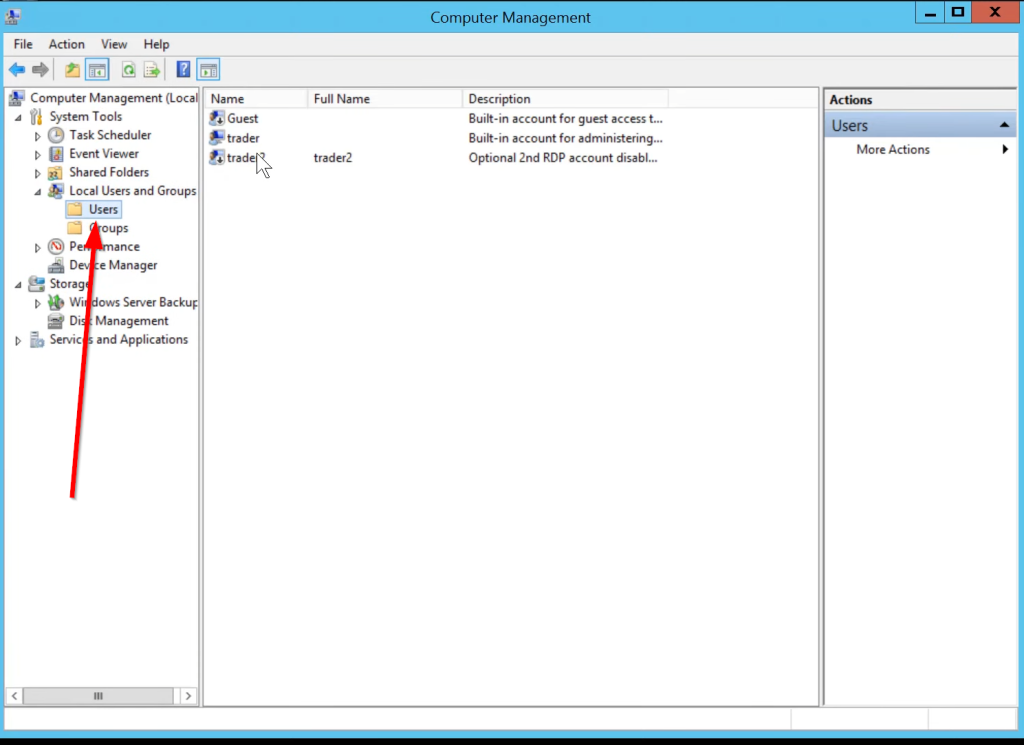
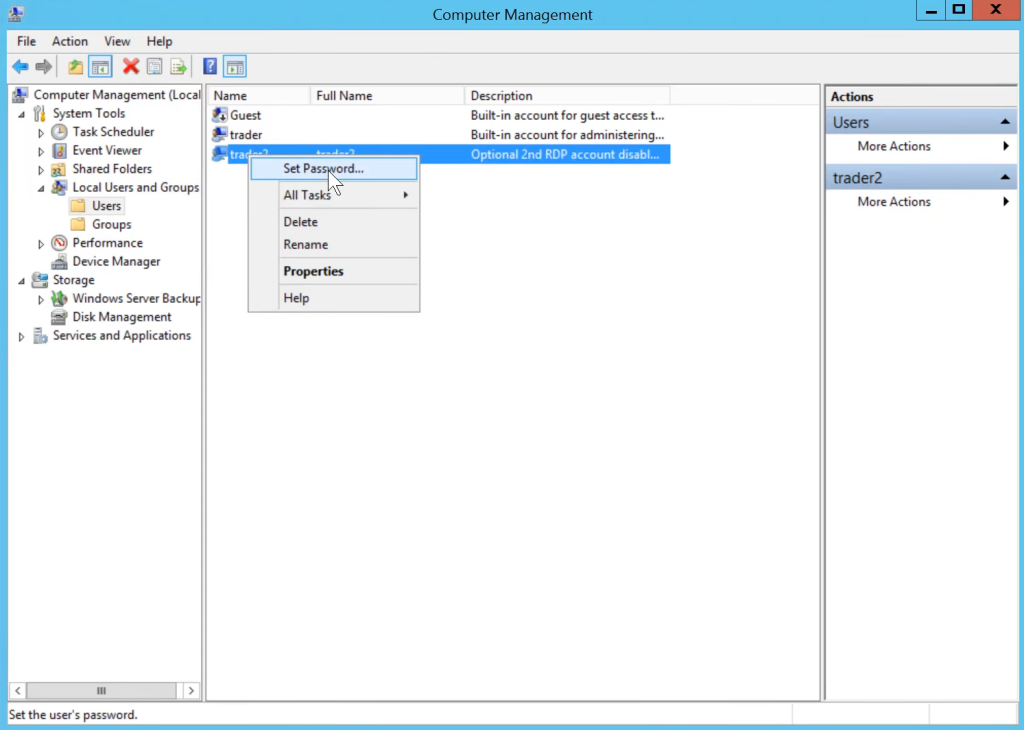
Step 4: Go to Local Users and Groups -> Users
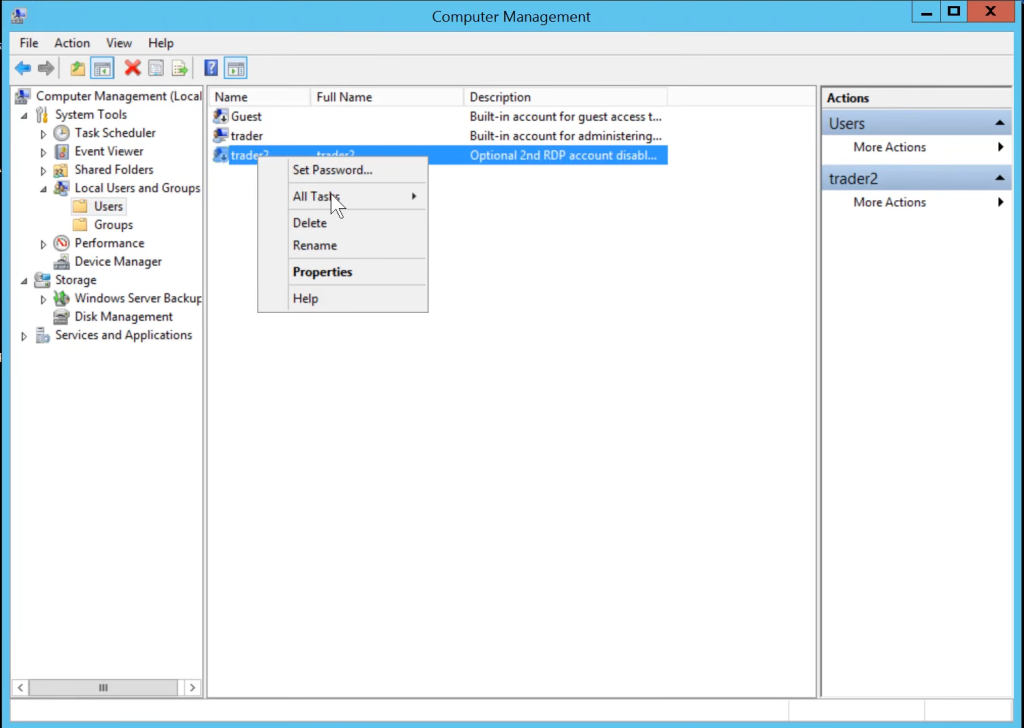
Step 5: Right-click on “trader2” and click on “Properties”.
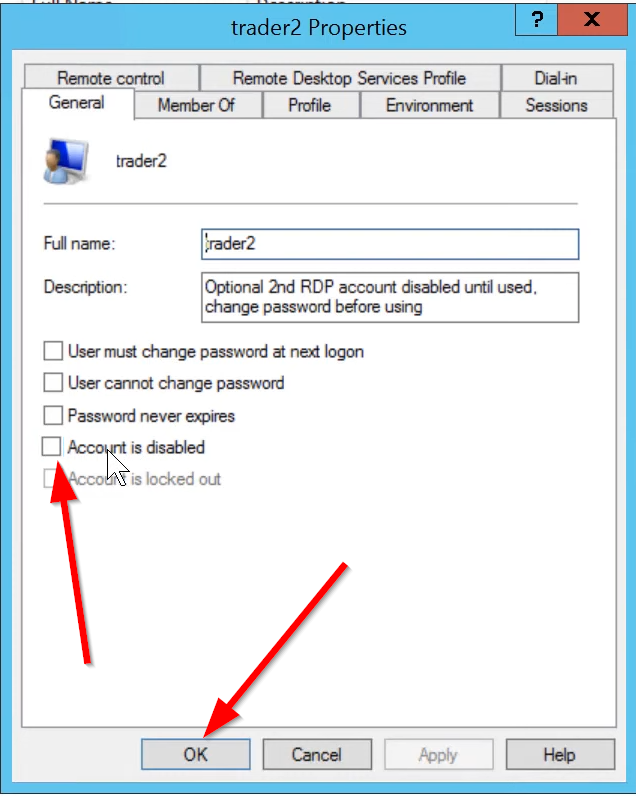
Step 6: Untick “Account is disabled” and press “OK.”
Step 7: Right-click on “trader2,” and click on “Set Password,” and click on “Proceed.”
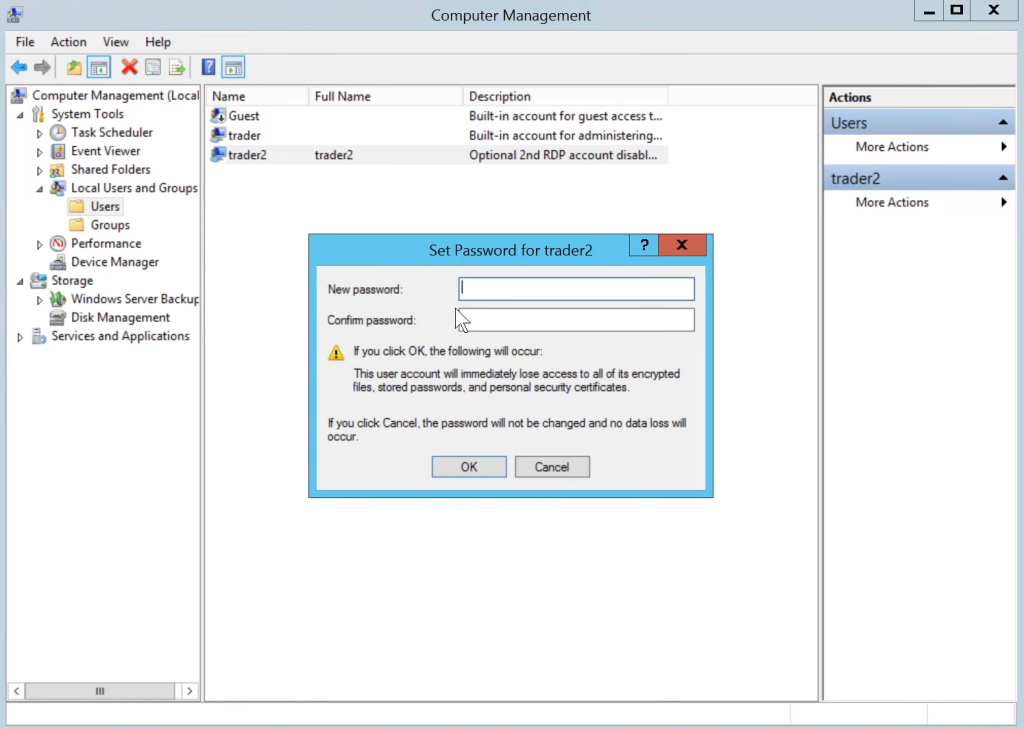
Step 8: Set a password, confirm it, and press “OK.”
Step 9: Test the New User
Log out of your admin session and log back in using the new user’s credentials to ensure everything is working correctly. You can also test remote access using RDP to verify the new user can connect.
That’s It!
You’ve now successfully created a second user on your Windows Server. Whether for basic use or admin roles, they should be able to log in and access the server as per the permissions you’ve given them.


